- Overview
- Updated OS to Version 13.4 Ventura
- Clean Installation
- My Setup
- Download Chrome from Safari
- Setting Up Alfred
- Set Up Your Mouse
- Set Up Your Keyboard
- Fetch and Apply dotfiles from GitHub
- Various Settings in Terminal
- Open All the Necessary Web Pages
- Further Fine-Tuning Personal Settings - Sort Out Accessibility
- Further Fine-Tuning Personal Settings - Sort Out Keyboard
- Further Fine-Tuning Personal Settings - Sort Out Finder
Overview
This is our annual MacBook setup article. The purpose of this article is to be opened when reinstalling Mac to ensure a smooth setup process. Since the setup procedure changes over time, this is a series that is written annually.
- (↑ Older)
- (2019-01-19)Third Year Traveling with Mac
- (2020-05-04)Fourth Year Traveling with Mac: Mojave
- (2020-05-06)Re-Setup of the Fourth Year Traveling with Mac
- (2021-01-09)Fifth Year Traveling with Mac: Catalina
- (2021-06-02)5.5 Years Traveling with Mac: Big Sur
- (2022-04-06)Sixth Year Traveling with Mac: Monterey
- (↓ Newer)
Updated OS to Version 13.4 Ventura
Speaking of Ventura, it's about the Continuity Camera Webcam.
That's right. With Ventura, you can use an iPhone with iOS 16 or later as a Webcam. If you are connected to the same Wi-Fi and Bluetooth is turned ON, you can connect instantly. The seamless usability is really "instant" and feels good. So far, I have tried with the following applications:
- Zoom, FaceTime: Can be used normally
- Meet launched on Chrome: At first, I had trouble because the iPhone wasn't recognized, but when I tilted the iPhone sideways, it was recognized. It seems that orientation matters.
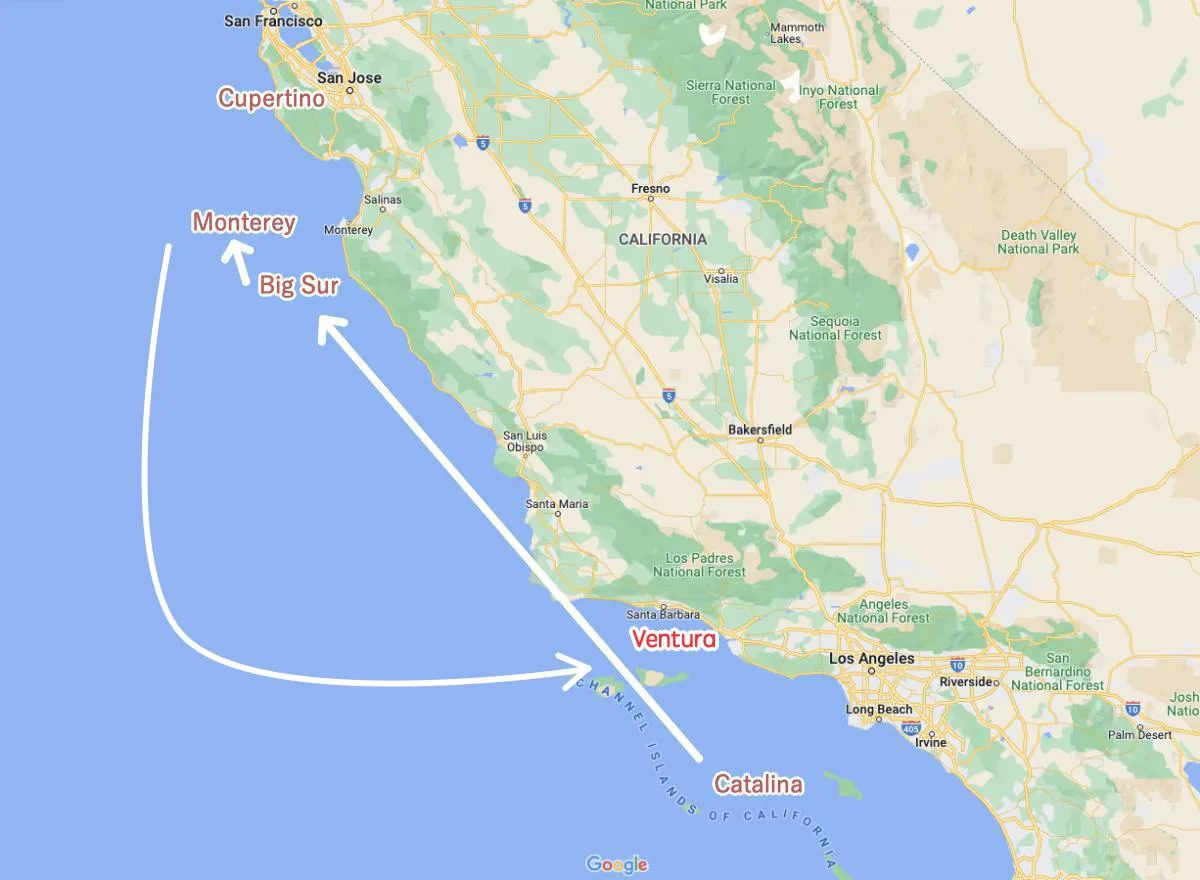
Ventura is a city in California. On the map, it's the part with the sideways indent. This indentation is the Santa Clara River.
As I always say, Cupertino is where Apple's headquarters is located.
By the way, previous versions of macOS can be obtained from the App Store.
Clean Installation
What to Do Before
- Time Machine backup takes time. Do it the day before.
- Upload the settings of your favorite editor to the cloud (Sublime Text and Visual Studio Code).
- Export Google Japanese Input dictionary (txt).
- Export MySQL Workbench's connection destination (zip).
- Back up the connection destination of Cyberduck (
/Users/user/Library/Group Containers/xxxx.duck/Library/Application Support/duck/Bookmarks- copy the contents). - Export Postman's collections (gear icon → Settings → Data → Export Data).
- Backup often-forgotten
.ssh(well, it's in Time Machine). - Have the Wi-Fi password, wired LAN login information, Apple ID login information ready on your iPhone (it's easier when reinstalling).
- Understand what the volumes that appear during the reinstall process,
Macintosh HDandMacintosh HD - Data, are. Twisting your head and wondering "What was this again......" can be a distraction. The former is a read-only volume, and the latter is a volume for storing files and data. - Open Apple's "How to erase and reformat a storage device with Disk Utility on Mac".
- Open Apple's "How to reinstall macOS". The official page is easy to understand after all.
Clean Installation and Reinstallation
Follow the two official articles above and do both.
My Setup
Record the setup for the seventh year.
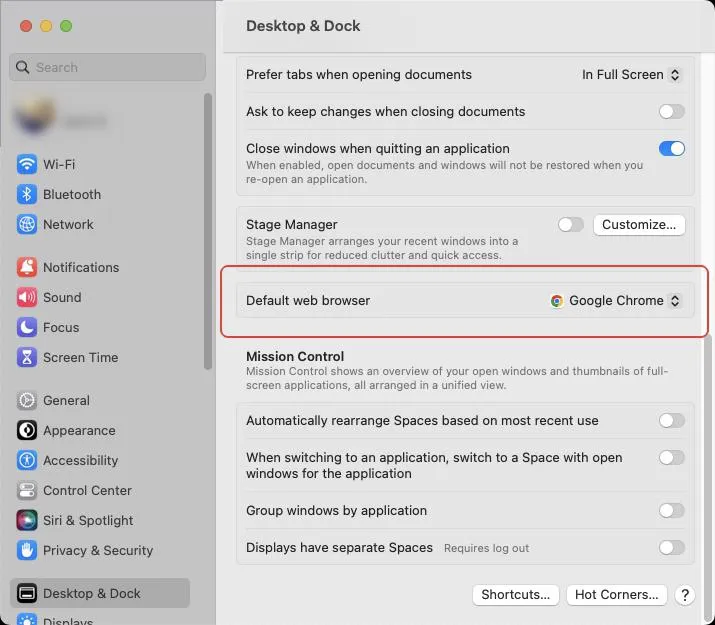
Download Chrome from Safari
As always. Set Chrome as the default browser.
Setting Up Alfred
Whenever I open Mac apps, including System Preference, I always use Alfred. So let's get this one first.
- https://www.alfredapp.com/
- Go to System Preference → Keyboard → Keyboard Shortcuts → Input Sources, disable the shortcut and yield Control + Space to Alfred.
Include Chrome bookmarks in your search. Also, remove unnecessary checks from Web Search. I noticed that it's easier to remove them if you sort by 'Enabled' first (little trick).
Set Up Your Mouse
This time, let's use Logicool Option + instead of Logicool Option.
Set Up Your Keyboard
Set the minimal key bindings, such as CapsLock → Ctrl, on Karabiner. Since we'll overwrite these settings with those saved in dotfiles later, you just need the basics for now.
Fetch and Apply dotfiles from GitHub
- Install your preferred GitHub Desktop app from https://desktop.github.com/.
- Go to System Preference → “Accounts” (even though the display name is Users & Groups, the internal name is different) → Right-click on the account → Advanced Options → Change Login shell to bash. Yes, I know. macOS recommends zsh. But it's a hassle to change .bash_profile and .bashrc to zsh specification…
Various Settings in Terminal
# Finder Settings
defaults write com.apple.finder AppleShowAllFiles -boolean true
defaults write com.apple.finder _FXShowPosixPathInTitle -boolean true
killall Finder

# Get the indispensable Homebrew for Mac
/bin/bash -c "$(curl -fsSL https://raw.githubusercontent.com/Homebrew/install/master/install.sh)"

# The command that becomes necessary before using brew.
sudo chown -R $(whoami) /usr/local/share/man/man8
# Hmm? Did I use this time? If it's unnecessary next time, remove it.

# Install what you want with brew
brew install coreutils awsebcli azure-cli pyenv pipenv cocoapods ffmpeg

# Get the favorite font MyricaM
open https://myrica.estable.jp/
Open All the Necessary Web Pages
Open all the web pages at once and install one after another.
open https://www.google.co.jp/ime/
open https://slack.com/get-started#/find
open https://www.spectacleapp.com/
open https://www.sublimetext.com/3
open http://firealpaca.com/
open https://github.com/jbtule/cdto/releases
open https://github.com/tomislav/osx-terminal.app-colors-solarized
open https://dev.mysql.com/downloads/workbench/
open https://brave.com/
open https://apps.apple.com/en/app/xcode/id497799835
open https://sparkmailapp.com/en
open https://www.keka.io/en/
open https://www.avira.com/en/free-antivirus-mac
open https://www.dropbox.com/install
open https://hub.docker.com/editions/community/docker-ce-desktop-mac/
open https://www.office.com/
open https://code.visualstudio.com/
open https://my.parallels.com/
open https://cyberduck.io/download/
open https://zoom.us/download
open https://www.postman.com/downloads/
open https://azure.microsoft.com/en-us/features/storage-explorer/
open https://www.deepl.com/en/app/
open https://www.notion.so/desktop
open https://clipy-app.com/
open https://get.adobe.com/en/reader/
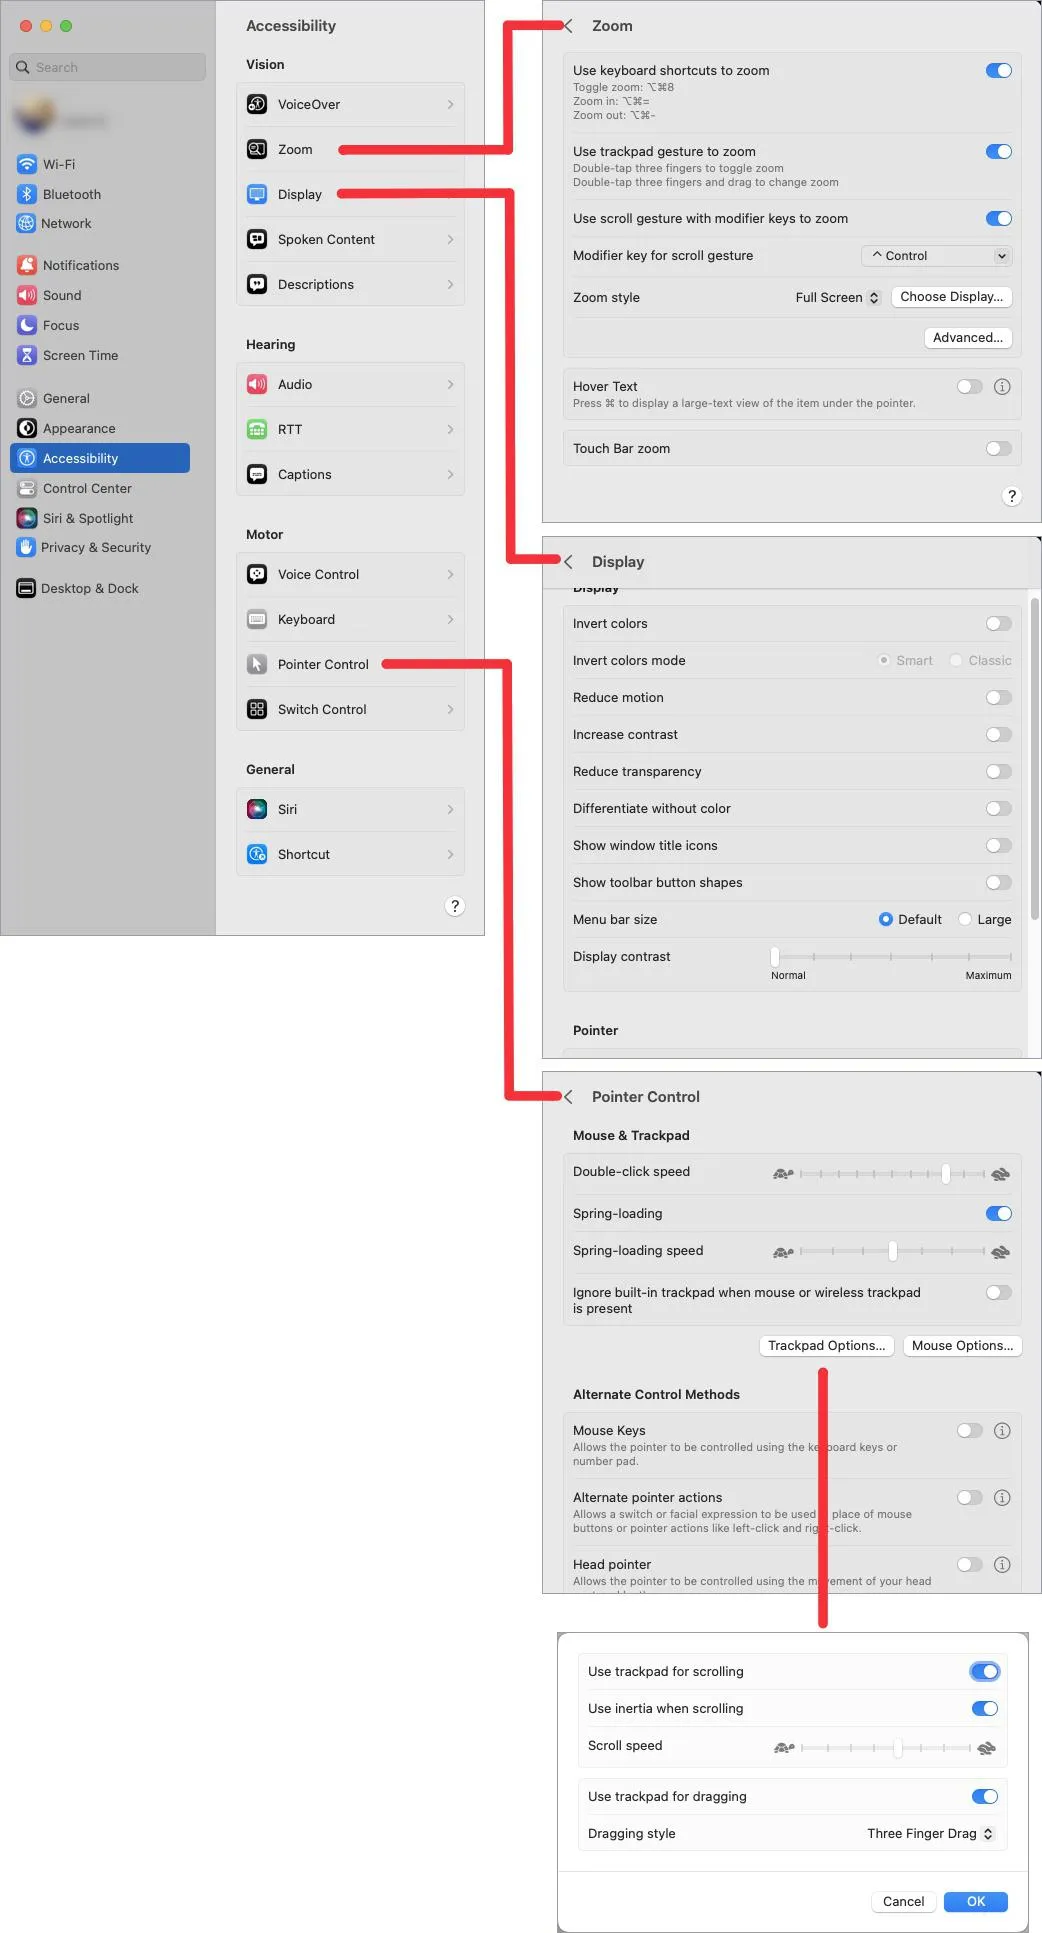
Further Fine-Tuning Personal Settings - Sort Out Accessibility
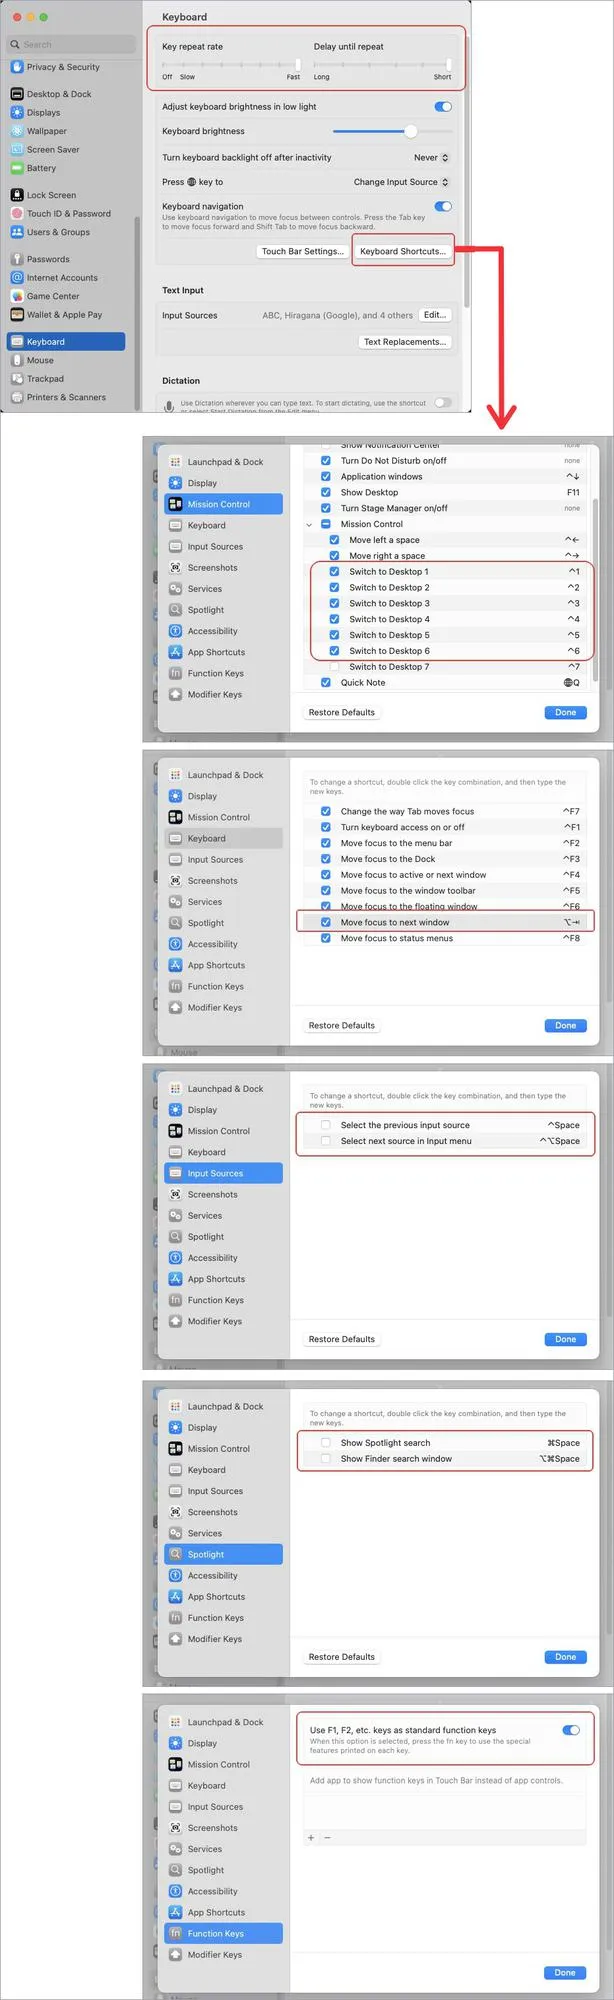
Further Fine-Tuning Personal Settings - Sort Out Keyboard
Further Fine-Tuning Personal Settings - Sort Out Finder